So, you acquired a OrangePi? Time to make it work with something that is not Linux for… reasons. Not my concern.
I know my reasons, it was simple will to use something different from the OS that I use to work for years. And that should be compiled from sources, since going to http://www.armbsd.org/arm/ is too easy. You must learn how its done, maybe it will be useful someday.
Without further ado, let’s go.
Retrieve sources
First, install a CVS client, I will not go in details. Ubuntu user? apt install cvs. Gentoo? emerge –ask -v dev-vcs/cvs.
Done that, choose a folder for your NetBSD. I will call mine as NetBSD_9 and it will be at *~/Projects/Personal/NetBSD_9 on my system. Change that to a folder of your choice.
This folder will contain two source repositories that will be needed. Go inside the folder just created, and follow the command sequence below:
export CVS_RSH=ssh
cvs -d anoncvs@anoncvs.NetBSD.org:/cvsroot co -r netbsd-9-2-RELEASE -P src
cvs -d anoncvs@anoncvs.NetBSD.org:/cvsroot co -r netbsd-9-2-RELEASE -P xsrc
By the end, it will have two folder, one src and another xsrc.
Compile the image
Unfortunately, NetBSD 9.2 is using a DeviceTree compiler that fails to build with any GCC version above 10.
To fix that, go to the src folder, and open on your favorite text editor the following file: ./external/gpl2/dtc/dist/dtc-lexer.l
Change line 43 to: extern YYLTYPE yylloc;
Save and close.
Still on src folder, type the following command to build the cross-compile toolchain, we will use “obj” folder that will reside in the same level as the future usr folder inside the NetBSD_9:
(the -j argument is the number of parallel processes, use the number of cores of your CPU)
./build.sh -U -u -O ../obj.earmv7hf -j10 -m evbarm -a earmv7hf tools
Done that step, copy the final summary, it will be necessary to compile the NetBSD uboot on your Linux machine. Of special importance, the DESTDIR and TOOLDIR.
===> Tools built to /home/fbugno/Projects/Personal/NetBSD_9/src/../obj.earmv7hf/tooldir.Linux-5.15.11-gentoo-dist-x86_64
===> build.sh ended:      Fri Feb 11 16:50:47 -03 2022
===> Summary of results:
         build.sh command:    ./build.sh -U -u -O ../obj.earmv7hf -j10 -m evbarm -a earmv7hf tools
         build.sh started:    Fri Feb 11 16:45:41 -03 2022
         NetBSD version:      9.2
         MACHINE:             evbarm
         MACHINE_ARCH:        earmv7hf
         Build platform:      Linux 5.15.11-gentoo-dist x86_64
         HOST_SH:             /bin/sh
         No $TOOLDIR/bin/nbmake, needs building.
         Bootstrapping nbmake
         MAKECONF file:       /etc/mk.conf (File not found)
         TOOLDIR path:        /home/fbugno/Projects/Personal/NetBSD_9/src/../obj.earmv7hf/tooldir.Linux-5.15.11-gentoo-dist-x86_64
         DESTDIR path:        /home/fbugno/Projects/Personal/NetBSD_9/src/../obj.earmv7hf/destdir.evbarm
         RELEASEDIR path:     /home/fbugno/Projects/Personal/NetBSD_9/src/../obj.earmv7hf/releasedir
         Created /home/fbugno/Projects/Personal/NetBSD_9/src/../obj.earmv7hf/tooldir.Linux-5.15.11-gentoo-dist-x86_64/bin/nbmake
         Updated makewrapper: /home/fbugno/Projects/Personal/NetBSD_9/src/../obj.earmv7hf/tooldir.Linux-5.15.11-gentoo-dist-x86_64/bin/nbmake-evbarm
         Tools built to /home/fbugno/Projects/Personal/NetBSD_9/src/../obj.earmv7hf/tooldir.Linux-5.15.11-gentoo-dist-x86_64
         build.sh ended:      Fri Feb 11 16:50:47 -03 2022
===> .
At the end, everything necessary to cross compile a NetBSD system from Linux will be on the obj folder.
Time to compile the system that will be used for that. Still inside src folder, type the command:
./build.sh -U -u -O ../obj.earmv7hf -j10 -m evbarm -a earmv7hf release
This step should take a bit of time, specially on older or weaker systems.
Now, a additional step but advisable: compile X11 and graphical applications. Even if not going to use it, some ports for NetBSD (either binary or source) depends on these libraries and they assume that they exist on your system.
./build.sh -U -u -O ../obj.earmv7hf  -j10 -x -X ../xsrc -m evbarm -a earmv7hf release
cd ..
Now, let’s compile uboot for OrangePi. For that, fetch the pkgsrc recipes for NetBSD on your NetBSD_9 folder.
Preparing pkgsrc
The NetBSD makes use of a multiplatform package solution called pkgsrc. Let’s prepare it for Linux.
Fetch the packages from cvs. At the time this tutorial where wrote, the latest version where 2021Q4.
cd ..
cvs -d anoncvs@anoncvs.NetBSD.org:/cvsroot co -r pkgsrc-2021Q4 -P pkgsrc
Now to go pkgsrc/bootstrap and open the file bootstrap on an editor. Add at line 1304 the following: –without-libb2
It will become like that:
$shprog ./configure $configure_quiet_flags --enable-static --disable-shared \
--disable-bsdtar --disable-bsdcpio --disable-posix-regex-lib --disable-xattr \
--disable-maintainer-mode --disable-acl --without-zlib --without-bz2lib \
--without-iconv --without-lzma --without-lzo2 --without-lz4 --without-libb2 \
--without-nettle --without-openssl --without-xml2 --without-expat --without-zstd \
Save, and execute the command below, the prefix argument will need to be absolute instead of relative (that is, don’t use ../../):
./bootstrap --prefix ~/Projects/Personal/NetBSD_9/pkg --unprivileged --cwrappers no --workdir /tmp/bootwork
At the end, it will emit the following message:
===========================================================================

Please remember to add /home/fbugno/Projects/Personal/NetBSD_9/pkg/bin to your PATH environment variable
and /home/fbugno/Projects/Personal/NetBSD_9/pkg/man to your MANPATH environment variable, if necessary.

An example mk.conf file with the settings you provided to "bootstrap"
has been created for you. It can be found in:

      /home/fbugno/Projects/Personal/NetBSD_9/pkg/etc/mk.conf

You can find extensive documentation of the NetBSD Packages Collection
in /home/fbugno/Projects/Personal/NetBSD_9/pkgsrc/doc/pkgsrc.txt.

Thank you for using pkgsrc!

===========================================================================

===> bootstrap started: qui 07 out 2021 23:24:21 -03
===> bootstrap ended:   qui 07 out 2021 23:27:05 -03
Following what was requested on this message, add /home/YOUR_USER_FOLDER/Projects/Personal/NetBSD_9/pkg/bin and sbin on system PATH at ~/.bashrc:
export PATH=~/Projects/Personal/NetBSD_9/pkg/bin:~/Projects/Personal/NetBSD_9/pkg/sbin:$PATH
Close and open the terminal again to apply the PATH, or if you don’t want the change to be permanent, just type the export command above on your shell and enter.
Check if the system can find the bmake command:
fbugno@Wilhelm ~ $ bmake
bmake: no target to make.

bmake: stopped in /home/fbugno
fbugno@Wilhelm ~ $
Edit the file ~/Projects/Personal/NetBSD_9/pkg/etc/mk.conf, and comment the line “ABI” with “#” and change CFLAGS to CFLAGS += -fcommon on the file:
#ABI=			64

CFLAGS += -fcommon
Compiling uboot for OrangePi Zero
Go to your pkgsrc folder, and then to sysutils/u-boot-orangepi-zero, now enter the following command to create a NetBSD package.
bmake package
This will take a while, since it will need to compile all the tools required just to compile uboot itself.
if failing with multiple definition of `yylloc’; scripts/dtc/dtc-lexer.lex.o: Open the file work/u-boot-2018.11/Makefile and add “-fcommon” at the end of the first HOSTCFLAGS that you can find. Then try again to compile with uboot with bmake package
This is because lots of Linux distributions already uses GCC newer than 10, where -fno-common is the enabled by default, and that gives problems with the older DTC. In a near future, the DTC itself that is shipped with pkgsrc will be updated, where the compiler version isn’t a problem anymore.
After it ends, it will give the path there the package where created:
=> Creating binary package /home/fbugno/Projects/Personal/NetBSD_9/pkgsrc/packages/All/u-boot-orangepi-zero-2018.11nb4.tgz
Install it with:
pkg_add /home/fbugno/Projects/Personal/NetBSD_9/pkgsrc/packages/All/u-boot-orangepi-zero-2018.11nb4.tgz
Now it is installed at ~/Projects/Personal/NetBSD_9/pkg/share/u-boot/orangepi-zero. This is the bootload for your OrangePi Zero.
Flash SDCard
If everything went ok until now, you got a NetBSD image, and a bootloader for OrangePi Zero! Time to test both.
Copy the NetBSD image and u-boot-sunxi-with-spl.bin to your home folder.
cp ~/Projects/Personal/NetBSD_9/pkg/share/u-boot/orangepi-zero/u-boot-sunxi-with-spl.bin ~
cp /home/fbugno/Projects/Personal/NetBSD_9/obj.earmv7hf/releasedir/evbarm/binary/gzimg/armv7.img.gz ~
With that, both the bootloader and the image should be at the same place. Now let’s flash them to a SD. On this example, the SD card got mapped at /dev/sda. Check where it is on your system before attempting to flash with “dmesg” command (may require sudo no newer machines):
[ 4045.924901] scsi 6:0:0:0: Direct-Access              SD Card Reader   1.00 PQ: 0 ANSI: 6
[ 4045.925410] sd 6:0:0:0: Attached scsi generic sg0 type 0
[ 4045.926277] sd 6:0:0:0: [sda] 31116288 512-byte logical blocks: (15.9 GB/14.8 GiB)
[ 4045.927062] sd 6:0:0:0: [sda] Write Protect is off
Now transfer the image to the SD card, may require sudo on your machine:
gzip -df armv7.img.gz
dd if=./armv7.img of=/dev/sda bs=1M
dd if=./u-boot-sunxi-with-spl.bin of=/dev/sda bs=1K seek=8 conv=sync
sync
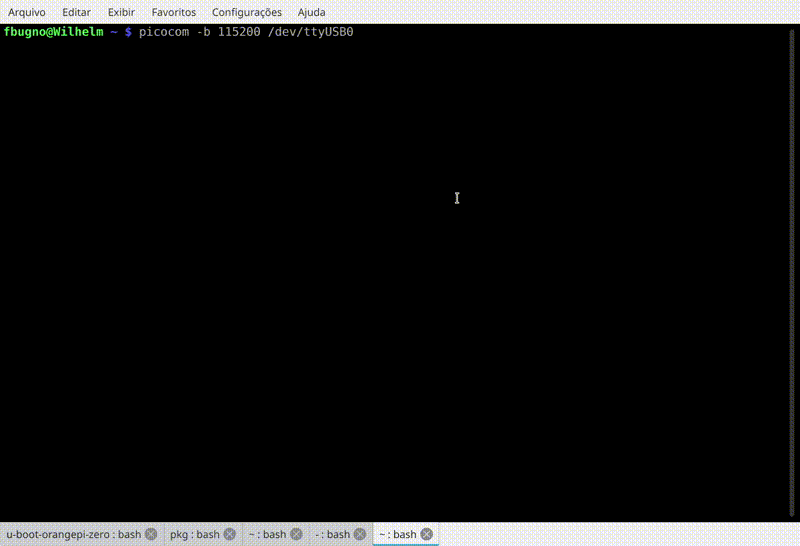
Insert the sdcard on your OrangePi Zero already prepared with a console cable, and with the console open on Linux with a application like putty, minicom or picocom.
On this demo below, I used picocom:
Congratulations! Now you just learned how to cross compile a NetBSD image.